

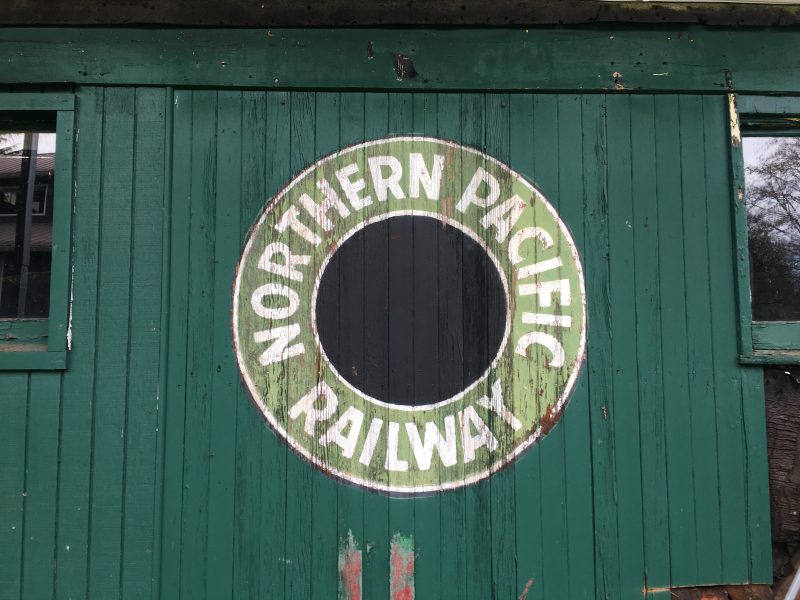
Historic Train Wooden Caboose Period Replication Snohomish WA Part One
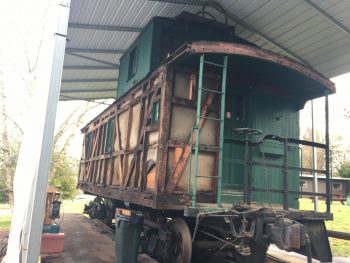
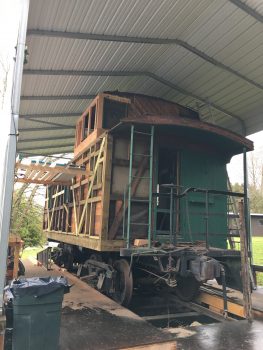
This awesome project came to me from a man who was looking for a craftsman who could help with his life long dream of restoring a train car caboose. More specifically, a Northern Pacific Railway caboose. I had no idea what to expect when I got the call, and really had my doubts about what I would find. I was pleasantly surprised when I found a train car perfectly set up on rails, a road bed, and a cover to preserve this beautiful piece of history! The guy was serious for sure, and it didn’t take long for me to want to get involved. I realized I’d be a good fit for this project. Not to mention it is no more than 5 minus from my shop, an added bonus!
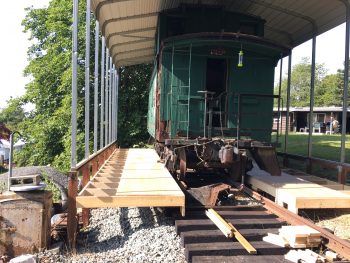
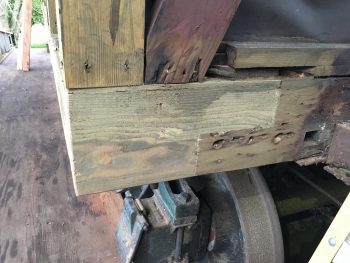
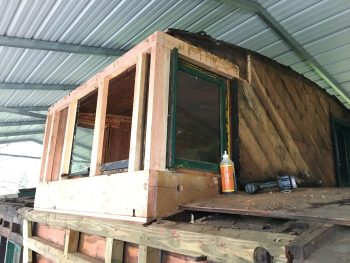
I first started with having to build a platform to work from, and also set about assessing the damage so I could get an idea of what kind of structural repairs would be needed. A lot apparently. So, with a project like this, its all about documentation and I mean everything! Thats because it’s an involved project that will take awhile. Without documentation it could become almost impossible to replicate if I didn’t have any reference. As with any structure, I needed to start at the bottom and work my way up. So the first order of business was to replace the structural side beam.
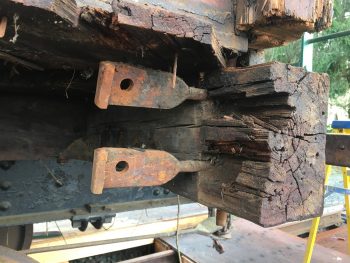

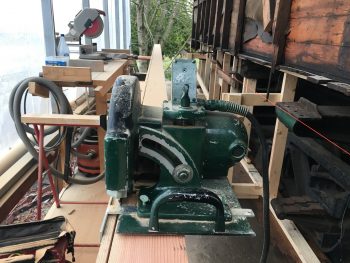
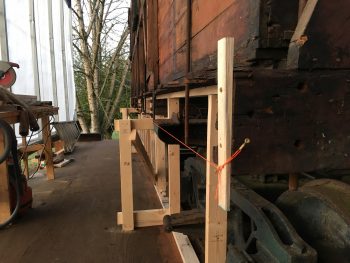
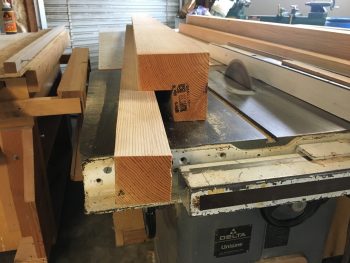
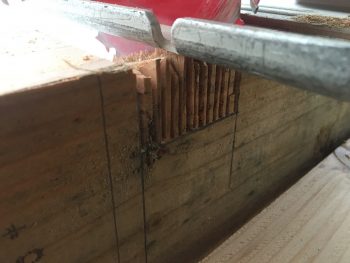
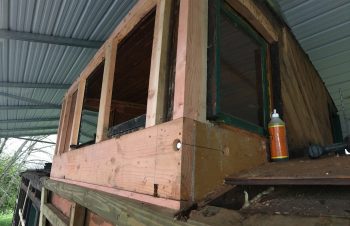
As you can see in the photos above removing the original beam revealed all the through rods. They have threaded ends with nuts and bolts that were designed into the structure. Also, notice the mortice and tenon work on every joint. I needed to replicate each joint so the fit would be perfect. After supporting the structure from underneath, I made some out riggers from the caboose so I could easily layout and work the new beam to fit. First though, I needed to rip down the stock to size, and there is no better way to do that then with my antique Rockler 12″ saw!
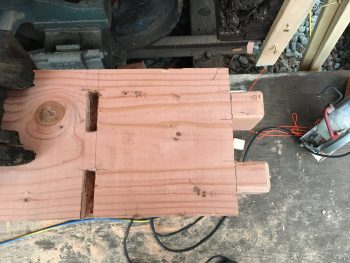
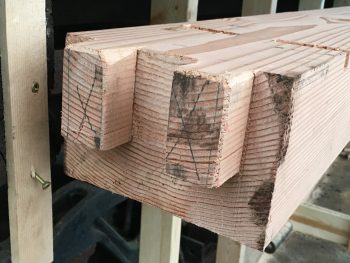
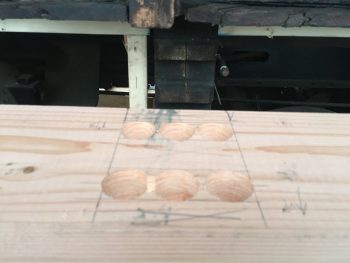
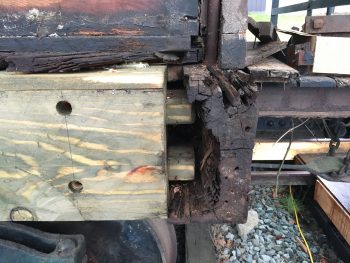
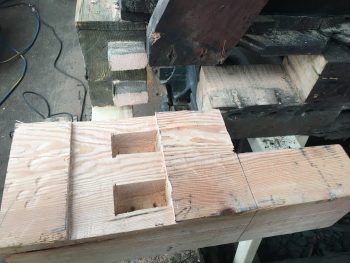

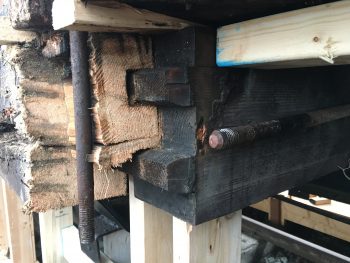
Once all the joints were made and all the holes drilled for the rods it was time to fit. Of course we made a plan to remove and refurbish the rods, but the trick was to have a plan for reinstalling the rods as we were rebuilding the structure. You can see from the photos above that I had to cut and fit the corner from the intersecting beam. It was completely decayed, so I choose to use a lap joint with glue. With everything morticed and tenon, with through rods and bolts, it was a really solid fix. Once everything was put together I washed everything with copper coat treatment.
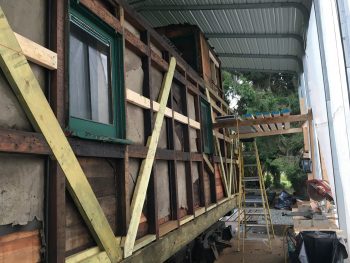
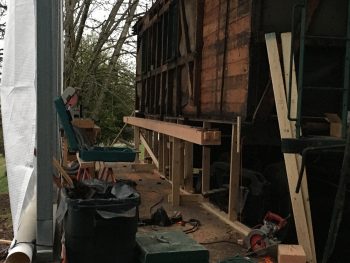
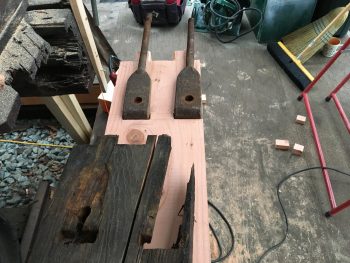
Once the undercarriage structure was done, I started with all the studs and sway braces. The framing studs and blocking had to be made to existing size so I was working with larger material that I had to rip down to fit. I pretty much built it exactly as what you see in the original cavity.
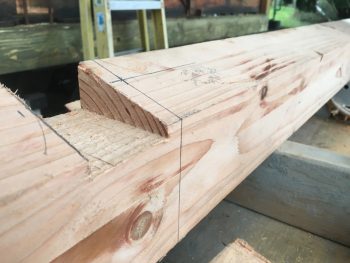
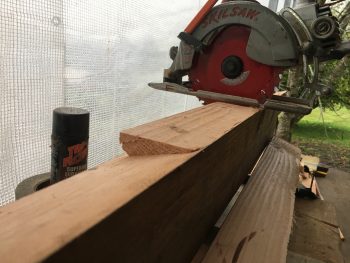
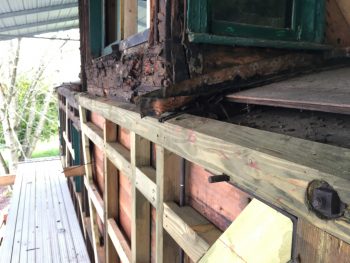
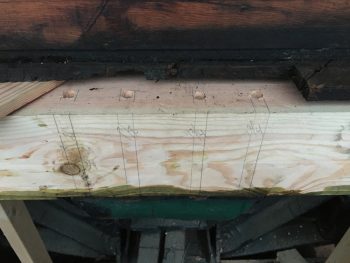
Interestingly in the photos above you’ll see the top beam being built to fit. It’s beveled on top and dadoed out to receive the rafter ribs very 2 feet or so. It had to be precise. To cut the depth I simply used the wedge of off fall from ripping the top bevel, and tacked that secure to make a nice 90 degree flat space to seat the skillsaw. Then it was simply cutting out the space and cleaning it up. Moving up, its all about the cupola.
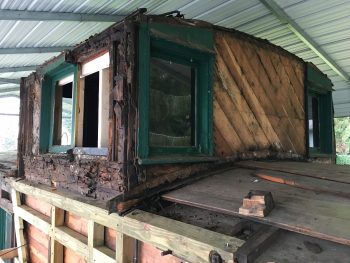
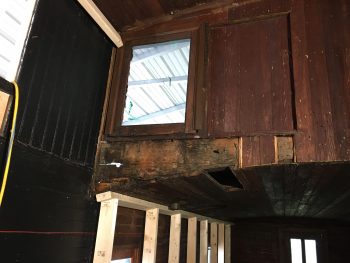
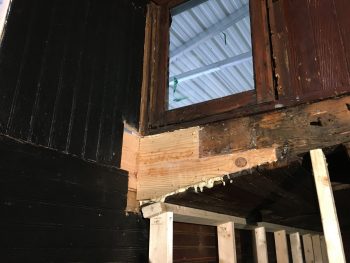
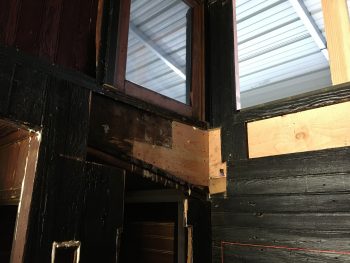
As you can see, the cupola needed to be disassembled, all the rods and corner bolts taken out, and the window removed. You can see form the one picture that the decay had come through the wall where the bolt was. That seemed to be the case everywhere. I guess metal holds moisture ie due point more than anything, or perhaps all the holes are great cavities for moisture to sit in. In any case, I supported the structure and carefully removed the decay from the existing beams, and manufactured new beams to fit. Everything got glued, screwed and bolted together. I even had to assemble the exterior wall with the rods pre inserted so everything could go together properly. One step before the other!
We are just getting started, so there will be a few blog posts later down the line. Thanks for sharing and see you on the next post! As always give me a call if you need a Craftsman for you’re period replication project.